基本思想
通过微服务、或nginx通过某种方式集成管理各个分散python脚本
技术路线
Nginx代理转发
通过配置脚本微服务web功能,通过nginx转发API。在此之前需要手动编写脚本web功能和API接口。
nginx 配置文件编写
1 | server { |
原py文件改造
主py文件编写
- main.py
1
2
3
4
5
6
7
8
9
10
11
12
13
14
15
16
17
18
19
20
21
22
23
24
25
26
27
28
29
30
31
32
33
34
35
36
37
38
39
40
41
42# from flask import Flask
import logging
import sys
from nameko.standalone.rpc import ClusterRpcProxy
import uvicorn
from fastapi import FastAPI
from loguru import logger
from app.http_server.log.log_base import LOG_DIR
from app.http_server.log.log_config import InterceptHandler, format_record
from app.http_server.router.router import api_router
from app.run.constant import app_port, log_man_input_path, log_man_out_path, publish_date, build_date, py_server_version
def init_app():
"""
APP init : log router ...
:return:
"""
# fast api app 启动项配置与启动
app = FastAPI(title="CTS Log Reporter", version="0.0.1",
description="Calmcar Tools System: Log analysis and reporter platform", debug=True)
# 路由引入
app.include_router(router=api_router, prefix="/api/v1")
# 日志配置与捕获
logging.getLogger().handlers = [InterceptHandler()]
logger.configure(
handlers=[{"sink": sys.stdout, "level": logging.DEBUG, "format": format_record}])
logger.add(LOG_DIR, encoding='utf-8', rotation="12:00")
logger.debug('日志系统已加载... 当前日志所在目录:' + LOG_DIR)
logging.getLogger("uvicorn.access").handlers = [InterceptHandler()]
return app
app = init_app()
# MQ配置
if __name__ == '__main__':
uvicorn.run(app='main:app', host='0.0.0.0', port=app_port, reload=True, workers=4)
API路由定义
- router.py
1
2
3
4
5
6
from fastapi import APIRouter
from app.http_server.view import log_process
api_router = APIRouter()
# 模块路由配置
api_router.include_router(log_process.router, prefix="/shell", tags=['脚本操作'])
API 接口定义
- api_manage.py
1
2
3
4
5
6
7
8
9
10
11
12
13
14
15
16
17
18
from fastapi import APIRouter
from nameko.standalone.rpc import ClusterRpcProxy
config_mq = {'AMQP_URI': "amqp://guest:guest@192.168.163.129:5672"}
router = APIRouter()
def call_service():
with ClusterRpcProxy(config_mq) as rpc:
# 消费者调用微服务(生产者),获取服务(生产者)的返回值
result = rpc.generate_service.hello_world(msg="xag msg")
# 返回结果
return result, 200
微服务网关转发
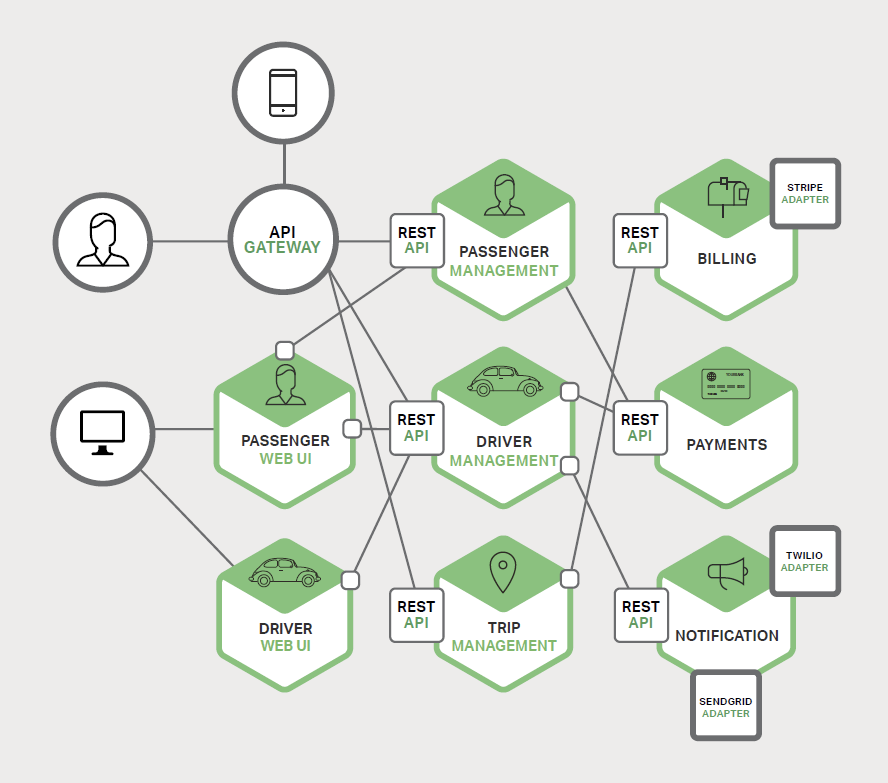
如图:代理网关转发来自web前端请求,并根据api转发对应微服务脚本。Gateway与微服务之间采用gRPC,微服务之间采用http(REST API)通信。

nameko

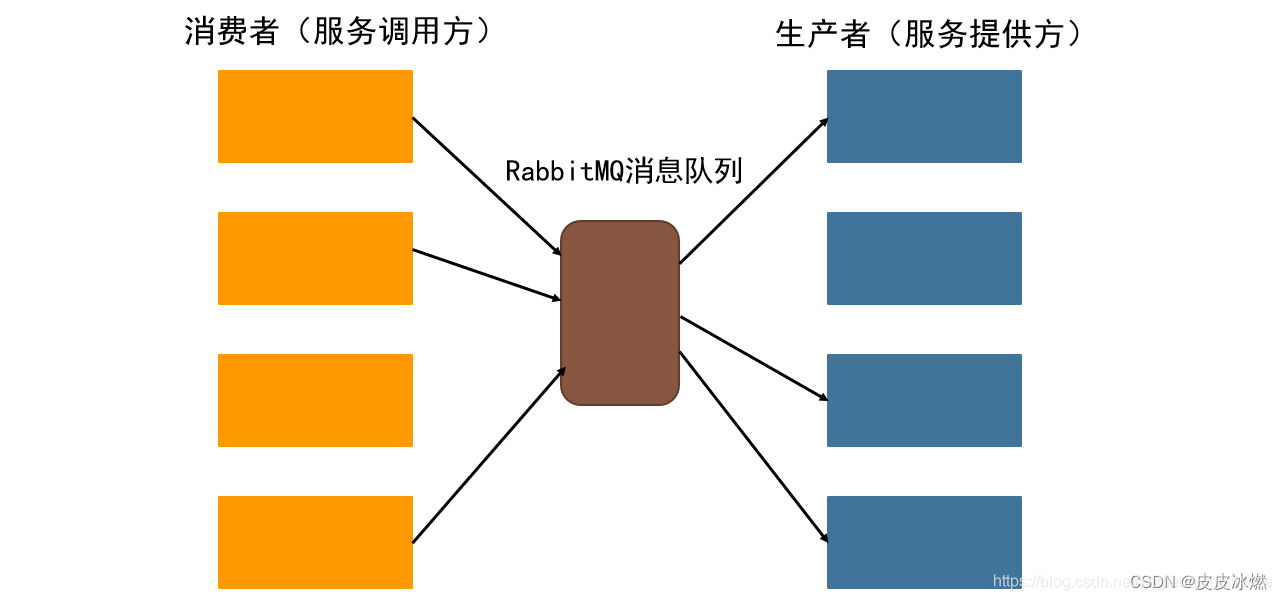
Nameko框架采用生产者-消费者模式。
搭建nameko框架
1 | pip install nameko |
构建生产者服务
1 | # producer_service.py |
通过rabbitmq注册微服务
1 | # 注册服务 |
消费者调用脚本微服务
1 |
|
生产者服务启动方式
命令行启动
1
nameko run generate_service --broker amqp://guest:guest@192.168.163.129:5672/
配置文件启动
1
2
3
4
5
6
7
8
9
10
11
12
13
14
15
16
17# config.yml
AMQP_URI: 'pyamqp://guest:guest@localhost'
WEB_SERVER_ADDRESS: '0.0.0.0:8000'
rpc_exchange: 'nameko-rpc'
max_workers: 10
parent_calls_tracked: 10
LOGGING:
version: 1
handlers:
console:
class: logging.StreamHandler
root:
level: DEBUG
handlers: [console]
# 启动命令行:
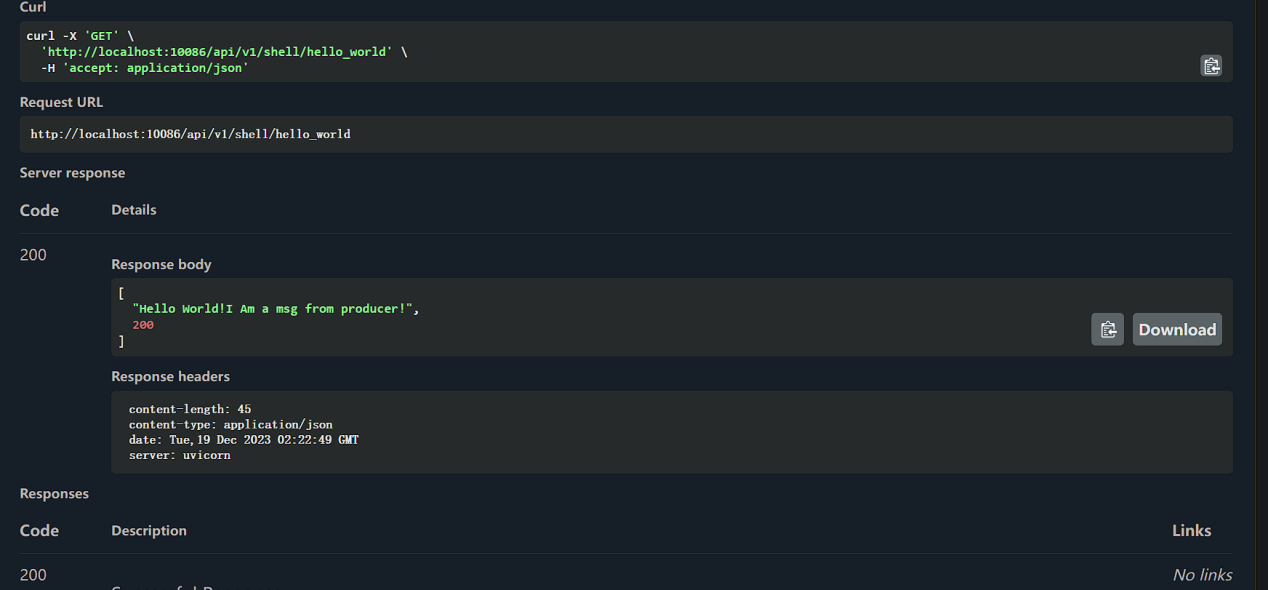
# nameko run --config config.yml service1结果示例:
调用者

被调用者

原web服务改造
将API迁移至消费者中,仅保留具体执行方法;安装nameko,编写生产者通过rpc调用的方法。
rabbitmq服务构建
构建docker容器
1 | docker pull rabbitmq |
web页面管理
1 | docker ps |
Bali
Bali is a framework integrate FastAPI and gRPC. If you want to provide both HTTP and RPC, it can improve development efficiency.
业务代码分布为在两个层次:Model 层和 Resource 层。Model 层是一个 Fat Model 模型,除了字段定义,还有与 Model 相关的一些逻辑;Resource 层提供同时兼容 HTTP/RPC 的资源服务。遵循 RESTful 及 gRPC 的开发指南定义了几个标准方法。
install
1 | # Bali framework |
application create
1 |
|
app start
1 | # With bali-cli |
test demo
1 | 创建gRPC 测试代码 |


