Integrating Unity as a library into standard Android app
This document explains how to include Unity as a Library into standard Android application through Activity. You can read more about Unity as a Library.
Requirements:
- Android Studio Bumblebee (2021.1.1) or later
- Unity version 2022.2.0a18 or later
[Note] For Unity versions from 2019.3.0b4 to 2022.2.0a17 use this branch
1. Get source
- Clone or Download GitHub repo uaal-example. It includes:

- Unityproject - this is a simple demo project made with Unity which will be integrated to the standard Android application
- NativeAndroidApp - this is the Basic Activity application from Android Studio templates where Unity project will be integrated. It has a simple UI, MainUnityActivity, which extends OverrideUnityActivity, and is prepared to start MainUnityActivity with an Intent
2. Generate Gradle project for Android platform
- Open UnityProject in Unity Editor
- Go to Build Settings window (Menu / File / Build Settings)
- Select and switch to Android Platform
- Go to Player Settings window (click Player Settings button at the bottom left corner of Build Settings or use Edit / Project Settings menu and choose Player tab on the left)
- In Other Settings -> Configuration section choose targeted architectures
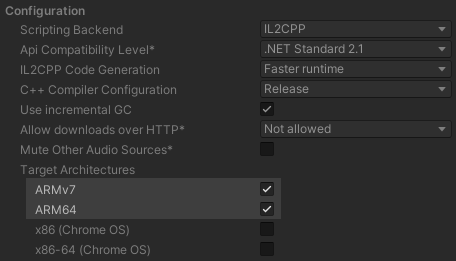
- In Other Settings -> Configuration section choose targeted architectures
- Go back to Build Settings window
- Select option “Export Project”

- Select option “Export Project”
3. Add Unity Library module to NativeAndroidApp
Do the following to add the exported androidBuild/unityLibrary module to the NativeAndroidApp Gradle project in Android Studio:
- Open NativeAndroidApp in Android Studio
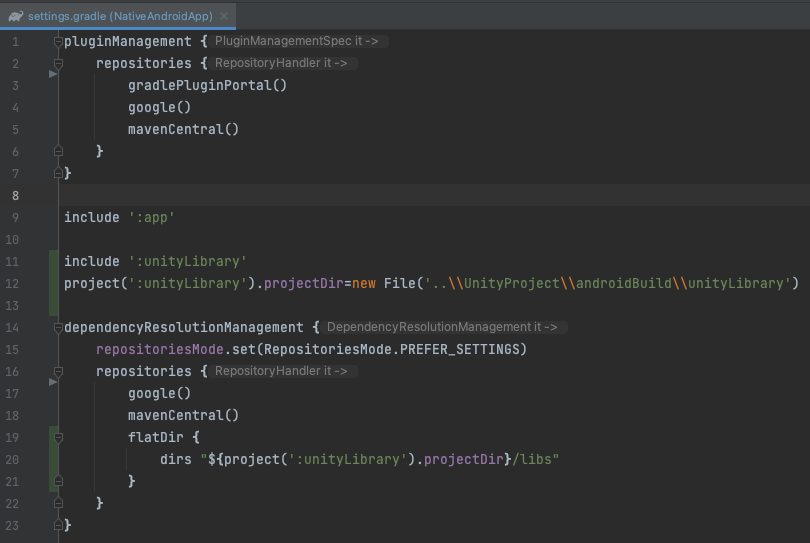
- Open settings.gradle file
- Add a new project pointing to unityLibrary module after the main app module
1
2
include ':unityLibrary'
project(':unityLibrary').projectDir=new File('..\\UnityProject\\androidBuild\\unityLibrary') - And add the following in dependencyResolutionManagement{repositories{ block
1
2
3
flatDir {
dirs "${project(':unityLibrary').projectDir}/libs"
}
- Add a new project pointing to unityLibrary module after the main app module
- Open build.gradle(Module: NativeAndroidApp.app) file
- Add the following in dependencies{ block
1
2
implementation project(':unityLibrary')
implementation fileTree(dir: project(':unityLibrary').getProjectDir().toString() + ('\\libs'), include: ['*.jar'])
- In the same file take a look at android{defaultConfig{ndk{ block and make sure abiFilters match the architectures you selected in Unity editor before exporting the project. The filter must match architectures in Unity editor exactly. If Unity exports only ARMv7 architecture, but the filter includes arm64-v8a, the application will crash on ARM64 devices. Check for valid abiFilters values in the official android documentation.

- Add the following in dependencies{ block
- Copy the contents of the gradle.properties file from the exported Unity project root folder to the gradle.properties file in the native application root folder. Note: if you update the Unity project and re-export it again, make sure that the contents of the gradle.properties file in the exported project did not change. If they did - repeat this step.
[img](/2023/02/22/android/gradlePropertiesApp.png)
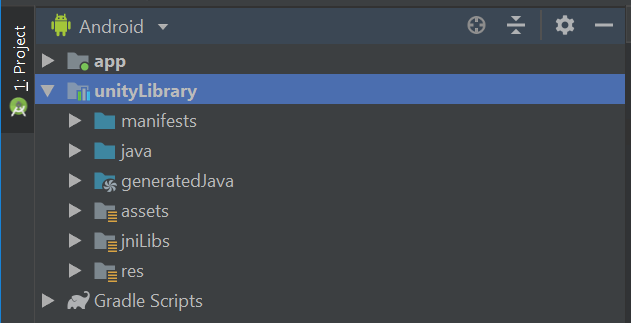
- Click Sync Now to do a project sync since Gradle files have been modified
img - If everything succeeds, you should see unityLibrary module added in Android view
Project is ready
Everything is ready to build, run and debug:
 |
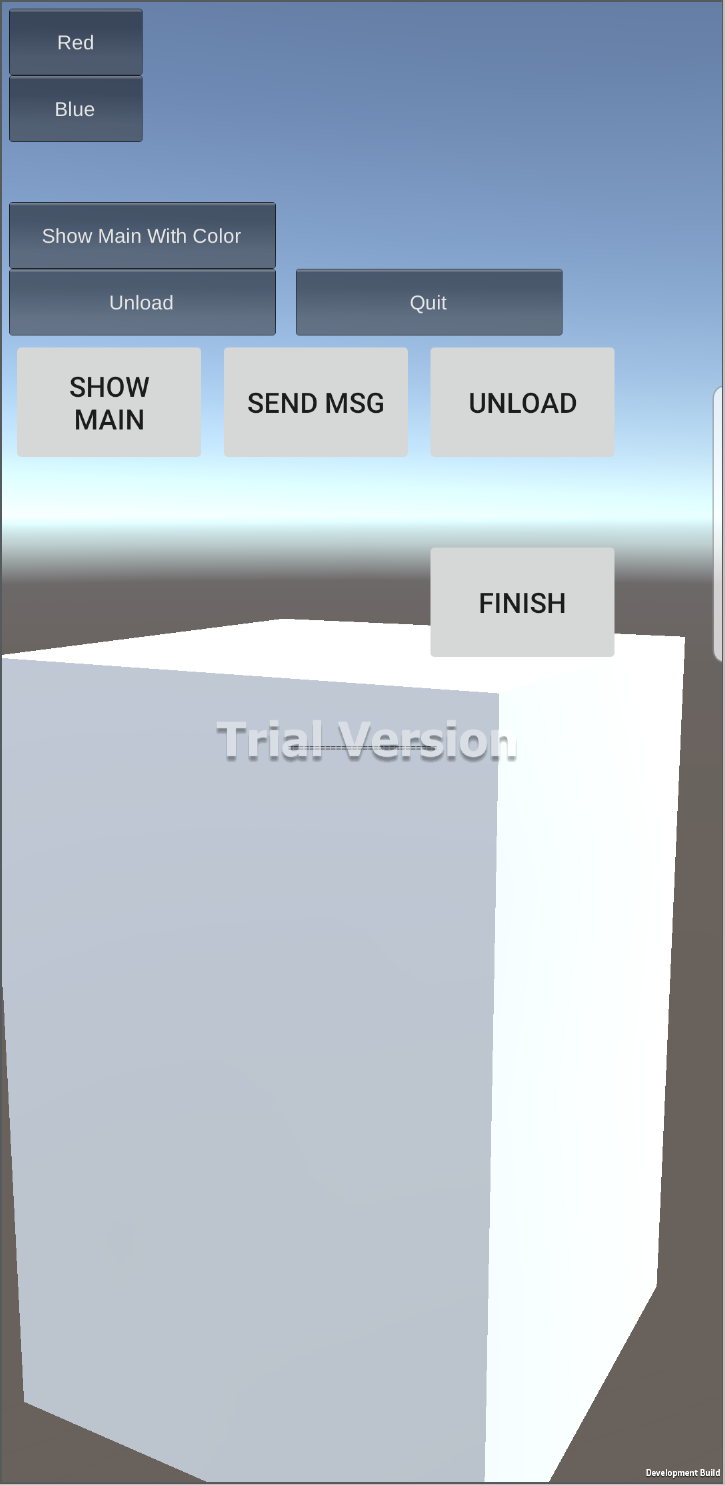 |
| Main Activity | Unity is loaded and is running in a separate Activity. Light grey buttons in the middle are added from the MainUnityActivity implemented in NativeAndroidApp |
Notes
- Unity is running in another process android:process=”:Unity” (AndroidManifest.xml at app module)
- After installation there will be two icons added on the device. To leave only the icon of the main activity, remove
… from the AndroidManifest.xml in unityLibrary - (Optional) We found some Android 7.* devices set frontOfTask to wrong state for activities as a result when finishing/quitting Unity activity whole task goes to background instead of bringing back Main activity. Next workaround keeps expected behavior: add to MainUnityActivity.java from NativeAndroidApp
1
@Override public void onUnityPlayerQuitted() { showMainActivity(""); finish(); }

